TTGO/LILYGO OTA Update
Introduction
The TTGO boards are one of the popular ESP32 products. Here we want to make a TTGO project with the OTA feature. The first step is to install the OTAdrive library (If you didn't do that before. go here). No matter which IDE you are using (PlatformIO or Arduino) you can use the OTAdrive library in your product.
Start coding
You should add the following lines to the setup method. You have to get your API key through your OTAdrive dashboard (see here).
#include <otadrive_esp.h>

void OnProgress(int progress, int total);

void setup()
{
  // Register your firmware info to the library
  OTADRIVE.setInfo("YOUR_API_APIKEY", "YOUR_FIRMWARE_VERSION");
  // Register your update progrees handler
  OTADRIVE.onUpdateFirmwareProgress(OnProgress);
...
}
Then you have to call the updateFirmwareInfo method to obtain whether there is a newer version or not. Note that there is a daily limit to call this method upon your membership plan on OTAdrive. You can call this method periodically or use and trigger button on your device. Here we use periodical checking by using the timeTick method.
void loop()
{
    if (WiFi.status() == WL_CONNECTED && OTADRIVE.timeTick(10))
    {
      auto inf = OTADRIVE.updateFirmwareInfo();
      if (inf.available)
      {
        lcd.printf("Updating: %s", inf.version.c_str());
        OTADRIVE.updateFirmware();
      }
    }
}
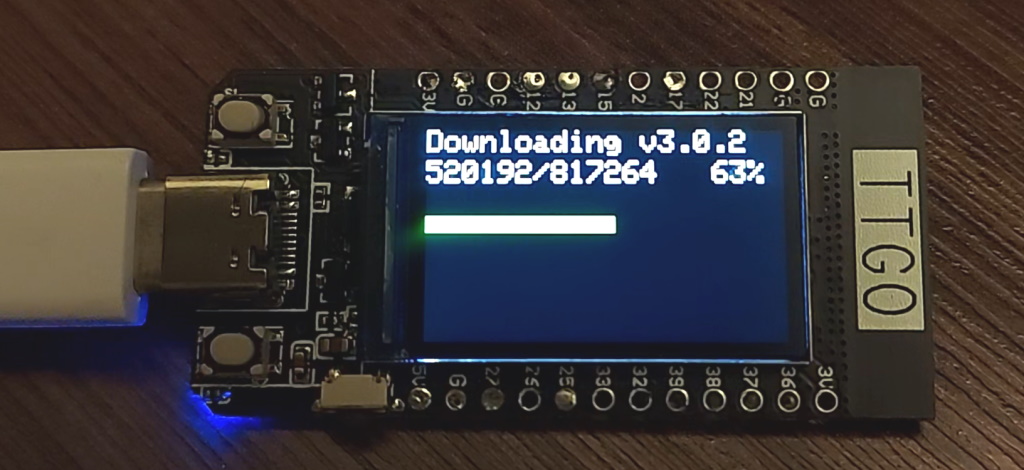
Now its time to show the user updating progress. The following code does that.
void ota_proggress(size_t downloaded, size_t total)
{
  int percent = downloaded / (total / 100 + 1);
  tft.setCursor(0, 20);
  tft.printf("%d/%d   %d%%", downloaded, total, percent);
  tft.fillRect(0, 56, percent * 2, 10, TFT_GREEN);
}
The full source code of this project is on our git repository. TTGO OTA Source Code
Then you can see the new software will download from the server.
 {.mud-image .fluid .object-fill .object-center}